Acabado de piezas de plástico
Cómo pulir piezas de acrílico sin velos, rayones ni quemaduras en los bordes
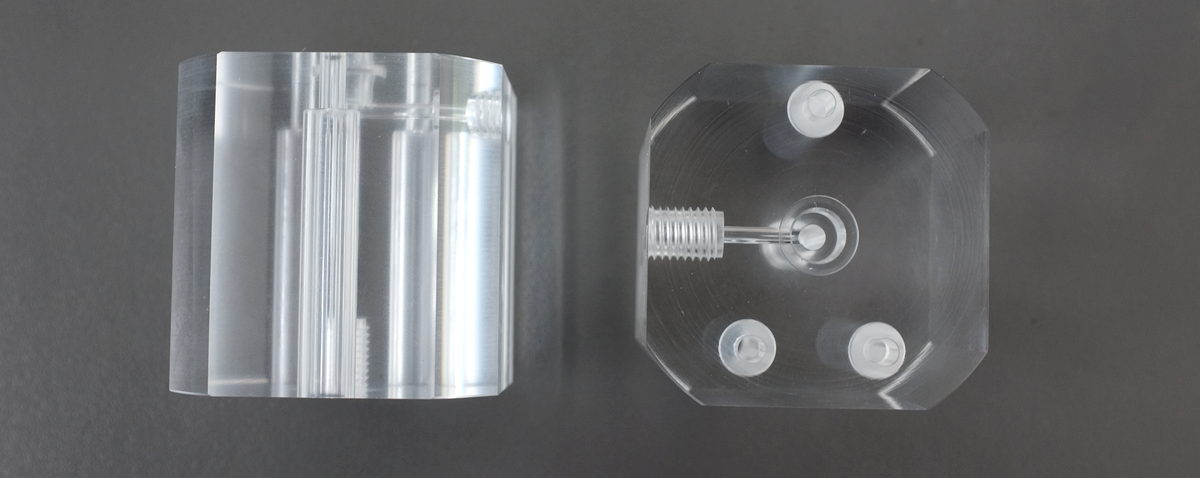
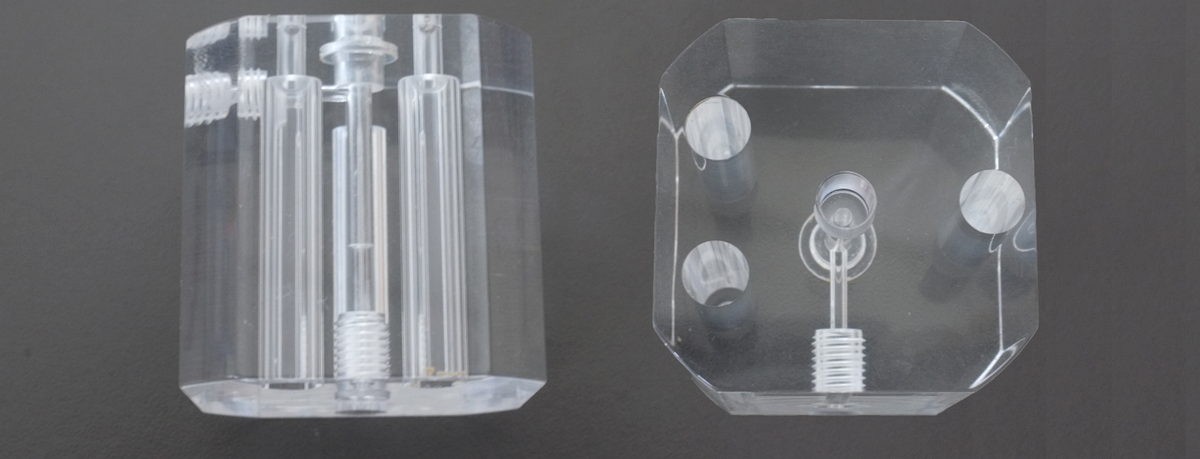
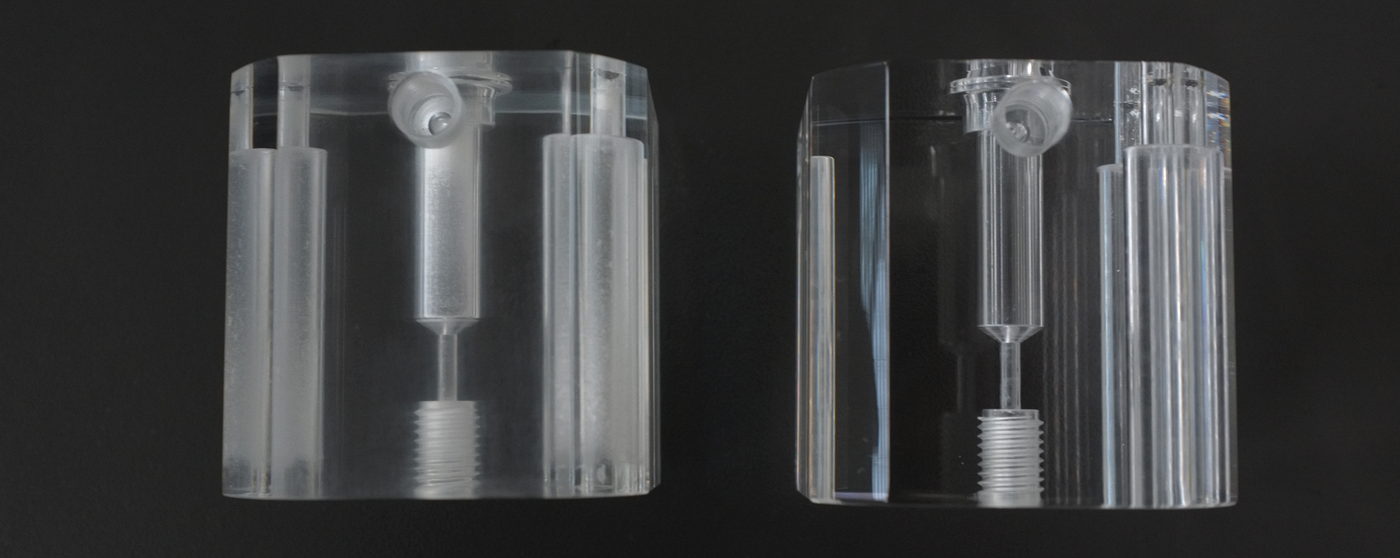
Las piezas de acrílico transparente no perdonan. Una pequeña rebaba, una ligera marca de lijado o un poco de calor en el borde pueden convertirse en una neblina visible una vez que la pieza se ensambla bajo luz. Para bloques de acrílico mecanizados, cubiertas ópticas, piezas de exhibición y componentes plásticos transparentes, el objetivo no es solo hacer que la pieza brille. El proceso debe mantener los bordes limpios, preservar la claridad y evitar tensiones internas o superficies turbias.
Si tus piezas de acrílico todavía se ven turbias después del pulido, el problema a menudo no es solo el paso final de pulido. Puede provenir de marcas de corte, medios demasiado agresivos, calor por fricción en seco, compuesto sucio, mala separación o daños por apilado después del acabado. Un proceso de acabado de superficies debe tratar el acrílico como un material visual blando y sensible al calor, no como una pieza metálica normal.
El problema real: las piezas transparentes muestran cada error del proceso
Las piezas metálicas a menudo pueden tolerar un ciclo de desbarbado ligeramente agresivo porque el pulido o recubrimiento posterior puede ocultar pequeñas marcas. El acrílico es diferente. El material es transparente, relativamente blando y sensible al calor. Si el proceso crea micro-rayones o tensión en los bordes, el defecto puede volverse más visible después de la limpieza, el secado o el ensamblaje del cliente.
- Velos superficiales: la pieza parece esmerilada en lugar de transparente, especialmente en las caras planas.
- Rayones circulares finos: la pieza refleja la luz pero muestra marcas en espiral bajo inspección.
- Bordes blancos: las esquinas o bordes mecanizados se vuelven lechosos después del acabado.
- Detalles funcionales redondeados: pequeños escalones, orificios o roscas pierden definición después de demasiado tiempo en la máquina.
Empieza separando tres trabajos diferentes
1. Reducción de marcas de herramienta
Si las líneas del cortador CNC son profundas, elige una etapa de pre-suavizado controlado. No saltes directamente a un paso de pulido brillante y esperes que elimine todas las líneas.
2. Pulido de claridad
Para la superficie final, usa medios finos o material de acabado en seco que pueda mejorar el brillo sin generar nuevos rayones en el acrílico.
3. Protección de bordes
Reduce el impacto pieza con pieza controlando el tamaño del lote, la relación medio-pieza y el método de descarga.
4. Limpieza e inspección
Los residuos pueden parecer velos. Limpia las piezas con cuidado e inspecciónalas bajo luz superior y lateral antes de juzgar el proceso.
Tabla de diagnóstico de defectos en el pulido de acrílico
| Síntoma | Causa probable | Qué verificar | Ajuste recomendado |
|---|---|---|---|
| La superficie plana permanece turbia después del pulido | Las marcas de herramienta son demasiado profundas, el medio es demasiado grueso o el tiempo de pulido no coincide con el paso anterior | Inspecciona una pieza sin terminar bajo luz lateral y compara la profundidad de las marcas del cortador antes y después del acabado | Añade una etapa de pre-suavizado controlado, luego usa medios más finos para la etapa final de brillo |
| Aparecen marcas finas en espiral después del secado | El medio o material de pulido en seco está contaminado con partículas duras | Verifica si el tambor de la máquina, el medio, el separador y el contenedor de almacenamiento contienen virutas metálicas o polvo abrasivo grueso | Limpia la máquina, separa el medio para acrílico del medio para metal y renueva el compuesto o material de acabado en seco |
| Los bordes se vuelven blancos o parecen con tensión | Calor por fricción excesivo, forma del medio agresiva o tiempo de ciclo demasiado largo | Verifica la temperatura del borde, la duración del ciclo y si las esquinas afiladas del medio golpean repetidamente la misma zona | Acorta el ciclo, reduce la amplitud o la velocidad y prueba medios plásticos más suaves o de acabado en seco |
| Pequeños orificios o detalles se redondean | Sobreprocesado o medio demasiado grande para características delicadas | Mide las dimensiones críticas antes y después de cada ciclo de prueba | Usa incrementos de prueba más cortos y elige medios que contacten la superficie sin atascarse en los detalles |
Pulido en húmedo o en seco: ¿cuál es más seguro para el acrílico?
El procesamiento en húmedo ayuda a controlar el calor y eliminar residuos. Puede ser útil cuando las piezas de acrílico tienen polvo de mecanizado, ligeras rebabas o residuos de operaciones anteriores. El riesgo es que la calidad del agua, el compuesto sucio o un mal secado puedan dejar marcas que parecen velos. Si se usa acabado en húmedo, debe combinarse con compuestos de acabado, agua limpia y un secado suave.
El acabado en seco puede mejorar el brillo en piezas plásticas visuales cuando la carga abrasiva es leve y el medio está limpio. A menudo es útil para el acabado final de apariencia, pero también puede generar calor si el ciclo es demasiado largo o la máquina está sobrecargada.
Antes de pulir, verifica las marcas de corte, el blanqueamiento de bordes y los detalles internos. Las marcas profundas necesitan un suavizado controlado antes del pulido de brillo final.
Selección de medios para piezas de acrílico
- Para rebabas ligeras y mezcla suave de bordes: prueba medios plásticos o medios de acabado suaves antes de considerar algo más agresivo.
- Para mejora del brillo final: probar material de acabado limpio en seco o medios de pulido muy finos que no introduzcan nuevos patrones de rayado.
- Para agujeros, ranuras y surcos estrechos: evitar formas de medios que puedan quedar atrapadas dentro de las características o golpear las paredes transparentes.
- Para grandes superficies planas: reducir el contacto entre piezas y mantener el lecho de medios lo suficientemente lleno para amortiguar las piezas.
Para piezas acrílicas pequeñas, un máquina de acabado vibratorio puede ser adecuada cuando la fuerza del proceso está controlada. Para piezas más delicadas, una máquina de tamboreo de barril rotatorio más lenta puede reducir el impacto. Si el objetivo es una etapa final de brillo en seco, revise los medios de acabado en seco y realice pruebas en pequeños lotes primero.
¿Necesita confirmar un proceso antes de la producción en serie? Envíe a JINTAIJIN fotos de sus piezas acrílicas, el grado del material si se conoce, las dimensiones, el estado superficial actual y la claridad objetivo. Podemos ayudar a revisar si su problema es causado por marcas de mecanizado, selección de medios, fuerza de la máquina, compuesto o manipulación después del pulido.
Contacte a nuestro equipo de acabado con su requisito de pulido de acrílico
Errores comunes que empeoran las piezas acrílicas
- Usar lógica de desbarbado de metal en el acrílico. El acrílico necesita menor fuerza y medios más limpios que muchas piezas metálicas.
- Solo extender el tiempo de ciclo. Un tiempo más largo puede aumentar la opacidad, el calor y el redondeo de bordes si los medios son incorrectos.
- Ignorar la superficie del CNC. Las marcas profundas de herramienta deben corregirse antes de la etapa final de pulido.
- Mezclar medios entre materiales. Las virutas metálicas y el polvo abrasivo pueden rayar el plástico transparente.
- Juzgar la pieza mientras aún está húmeda. La película de agua puede ocultar rayones finos y residuos hasta que la pieza se seque.
- Dejar caer piezas pulidas en contenedores duros. Muchos rayones en acrílico ocurren después del ciclo de máquina, durante la descarga y la inspección.
Después del pulido, inspeccione tanto el brillo de la superficie como la claridad visual interna. Un buen proceso de acrílico debe mejorar la apariencia sin afectar suavemente la geometría funcional.
Recomendación final
El pulido de acrílico debe estructurarse como un proceso por etapas: reducir primero las marcas de mecanizado, luego pulir para lograr claridad y finalmente proteger la pieza durante la descarga. El equipo adecuado puede ser un acabado vibratorio, un tambor rotatorio o un sistema de acabado en seco, pero el proceso siempre debe probarse con piezas reales antes de la producción en serie.
Envíenos los detalles de sus piezas acrílicas para recibir asesoramiento de proceso. Incluya fotos de las piezas, tamaño, espesor de pared, agujeros o ranuras, fotos de defectos actuales, acabado objetivo y cantidad de producción esperada. JINTAIJIN puede ayudar a recomendar una máquina de acabado, medios, compuesto y dirección de pruebas de muestra para su aplicación de pulido de acrílico.
 +86-592-2381506


 Compatible con red IPv6